> ## Documentation Index
> Fetch the complete documentation index at: https://docs.playflowcloud.com/llms.txt
> Use this file to discover all available pages before exploring further.
# Quick Start - Godot
> Step-by-step tutorial for getting up and running with Godot on PlayFlow Cloud
# Getting Started with Godot on PlayFlow
This guide assumes you have some or all of your game already written using Godot and are now ready to use PlayFlow to implement a dedicated server. You can also use PlayFlow throughout the development process as its one-click deployment makes it easy to setup a temporary server for testing.
**Godot 4.x** - This guide uses Godot 4.4, but any 4.x version should work. We'll be using WebSocket networking for cross-platform compatibility.
## Prerequisites
Before you start, make sure you have:
* **Godot 4.x** installed with the Linux export templates
* A **PlayFlow Cloud account** (created in the first step below)
* A Godot project with multiplayer networking, or you can follow the [multiplayer game tutorial](/guides/godot-first-multiplayer-game) to build one from scratch
## Before We Begin
If you don't have a project already setup but want to follow this tutorial, you can create a complete multiplayer game from scratch using our comprehensive guide.
Complete tutorial for building a multiplayer game in Godot with PlayFlow
Configure your game to automatically start as a server in headless builds. In your main multiplayer manager script, add server detection:
```gdscript theme={null}
func _ready() -> void:
if OS.has_feature("dedicated_server"):
start_server()
```
This ensures your server starts automatically when deployed to PlayFlow.
Once that's all done we can move on to using PlayFlow Cloud!
## Deploying Your Game with PlayFlow
Go to the [PlayFlow Cloud website](https://app.playflowcloud.com/) and sign-up using your email, or log in with your GitHub or Google account. If asked, confirm your email address to complete the setup.
Create an Organization to hold your projects (and your team, on Pro).
* Enter an organization name
* Click **Create Organization**
New organizations start on the **Free** plan (max 1 active server, forced `small` size, 1-hour TTL). You can upgrade to **Pro** later from **Billing** in your project settings to unlock all compute sizes, longer TTLs, and unlimited active servers.
Click **Create New Project** and enter:
* **Project Name**: Your game name
* **Game Engine**: Godot
Click **Create Project** to proceed.
1. Go to **Project → Export** in Godot
2. Add a **Linux/X11** export preset
3. In the **Resources** tab, set **Export Mode** to "Export as dedicated server"
4. **IMPORTANT**: Name your executable "Server" (required by PlayFlow)
5. Export your project and create a .zip archive of all files
The dedicated server export creates a headless build perfect for PlayFlow deployment.
1. In the PlayFlow dashboard, go to the **Builds** tab
2. Click **Upload Build**
3. Upload your .zip file containing the server executable
4. Wait for the upload to complete
PlayFlow will automatically detect and configure your Godot server build.
Now we will setup the port to use in the PlayFlow dashboard. Open up the website and head to the **Configuration** tab and then **Network Ports** section. Click the **Add Your First Port** button and fill in the fields.
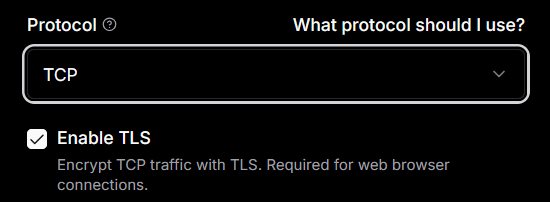 * **Port Name**: `godot_websocket`
* **Port Number**: `8080` (or your configured port)
* **Protocol**: **TCP**
* **Enable TLS**: **Yes** (required for "wss\://" connections from web clients)
* **Description (Optional)**: WebSocket port for Godot multiplayer
Click the **Add Port** button to finish this step.
**Enable TLS** is critical for web browser compatibility. Without TLS, web clients cannot connect using "wss\://" protocol.
Now we are ready to start our server, head over to the Servers tab and click the **Create Your First Server** button.
* **Port Name**: `godot_websocket`
* **Port Number**: `8080` (or your configured port)
* **Protocol**: **TCP**
* **Enable TLS**: **Yes** (required for "wss\://" connections from web clients)
* **Description (Optional)**: WebSocket port for Godot multiplayer
Click the **Add Port** button to finish this step.
**Enable TLS** is critical for web browser compatibility. Without TLS, web clients cannot connect using "wss\://" protocol.
Now we are ready to start our server, head over to the Servers tab and click the **Create Your First Server** button.
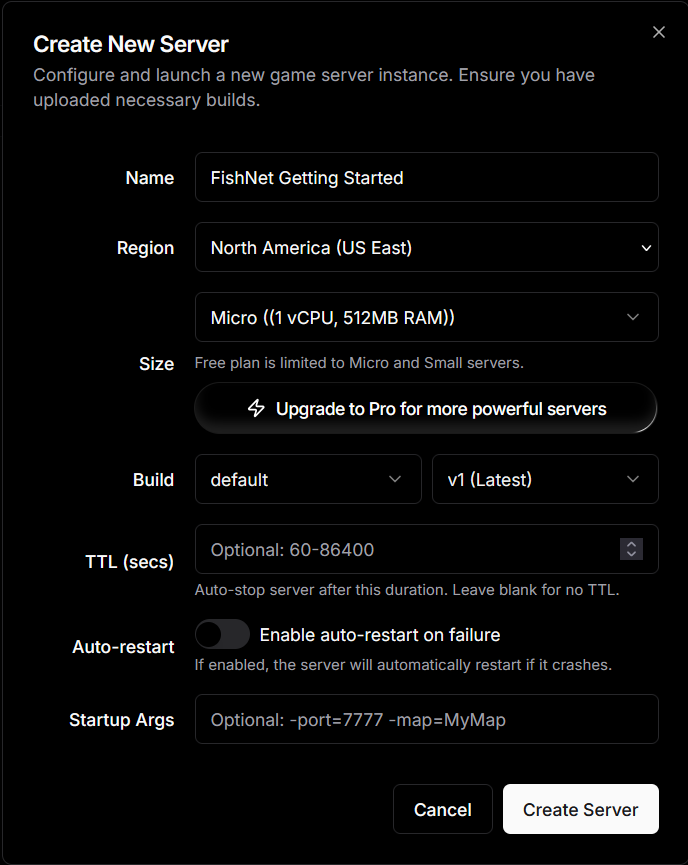 A window will pop-up letting you customize the settings for this server. You can change the **Name** to "Godot Game Server", or choose any name you like as well as customizing the other settings to better suit your needs. Once you are happy, press **Create Server**.
You should now see the server in the Servers tab and you can see its details or stop it directly from here.
A window will pop-up letting you customize the settings for this server. You can change the **Name** to "Godot Game Server", or choose any name you like as well as customizing the other settings to better suit your needs. Once you are happy, press **Create Server**.
You should now see the server in the Servers tab and you can see its details or stop it directly from here.
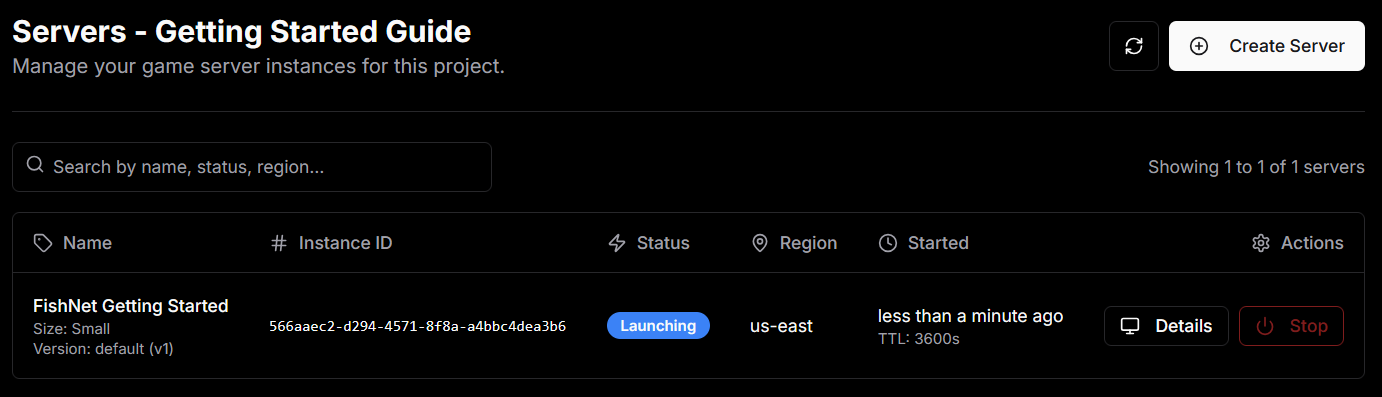 Click on the **Details** button to see the details of the server. Look at the **Details → Network** section and copy the Host and External Port.
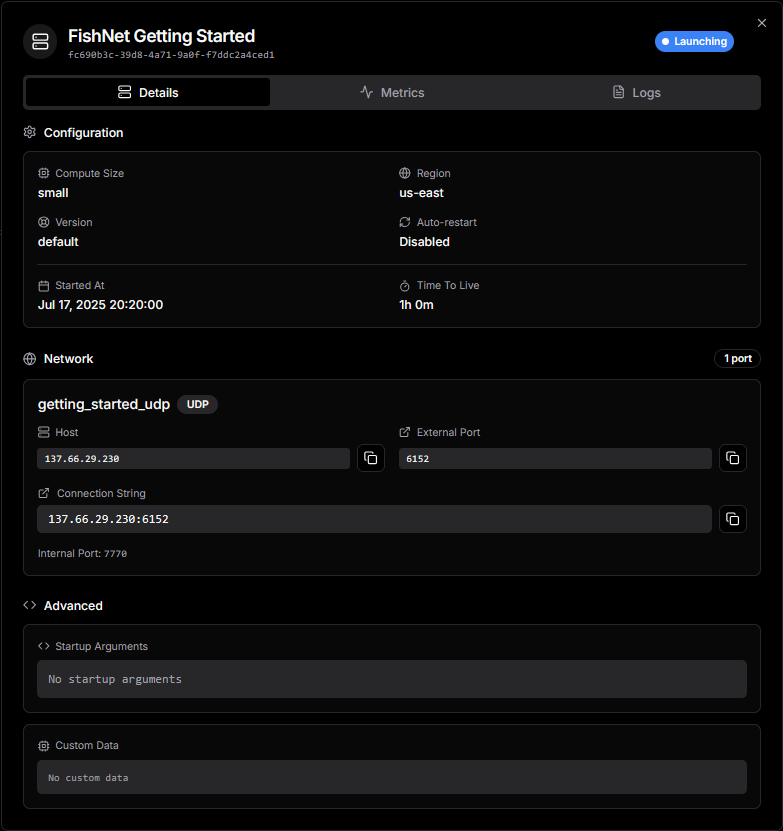 Configure your Godot client with the PlayFlow server details:
**In your connection script:**
```gdscript theme={null}
func connect_to_server(host: String, port: String):
var peer = WebSocketMultiplayerPeer.new()
var url = "wss://" + host + ":" + port
var error = peer.create_client(url)
if error == OK:
multiplayer.multiplayer_peer = peer
```
**For Web Builds**: Always use "wss\://" protocol for secure WebSocket connections. For local testing, you can use "ws\://" but production deployments should use TLS.
1. Run your Godot project locally or export a client build
2. Enter the PlayFlow Host and External Port in your connection UI
3. Connect to the server
4. Your game should connect to the PlayFlow server and work correctly!
**Testing Multiple Clients**: Enable **Debug → Customize Run Instances → Enable Multiple Instances** in Godot to test multiple clients connecting to your PlayFlow server.
## Take the Next Steps!
Well done! You've now learned how to setup and deploy your Godot server using PlayFlow.
## Resources
* **PlayFlow Documentation**: [docs.playflowcloud.com](https://docs.playflowcloud.com/)
* **PlayFlow Discord**: [discord.gg/P5w45Vx5Q8](https://discord.gg/P5w45Vx5Q8)
* **Godot Documentation**: [docs.godotengine.org](https://docs.godotengine.org/)
* **Godot Multiplayer**: [docs.godotengine.org/en/stable/tutorials/networking](https://docs.godotengine.org/en/stable/tutorials/networking/)
## Next Steps
Build a complete multiplayer game from scratch
Add lobbies to your Godot game
Implement matchmaking for competitive play
PlayFlow's lobby and matchmaking systems are engine-agnostic REST APIs (`/api/v3/lobbies`), so they work from Godot too. The linked pages use Unity examples, but the same HTTP endpoints apply — call them from GDScript with `HTTPRequest`, sending your key in the `api-key` header.
## Common Issues
Ensure your server detection script uses `OS.has_feature("dedicated_server")` and that the "Export as dedicated server" option is enabled in your export preset.
* Verify TLS is enabled in PlayFlow port configuration
* Ensure you're using "wss\://" protocol for web clients
* Check that the port (8080) matches between your server code and PlayFlow configuration
* Verify firewall rules aren't blocking connections
* Check that MultiplayerSpawner is properly configured
* Verify MultiplayerSynchronizer is set up on player scenes
* Ensure players are being added to the correct groups
* Check that spawn functions are called when peers connect
* Verify the server URL and port are correct
* Check that the PlayFlow server instance is running
* For local testing, use "ws\://" instead of "wss\://"
* Ensure your networking code handles connection failures gracefully
Configure your Godot client with the PlayFlow server details:
**In your connection script:**
```gdscript theme={null}
func connect_to_server(host: String, port: String):
var peer = WebSocketMultiplayerPeer.new()
var url = "wss://" + host + ":" + port
var error = peer.create_client(url)
if error == OK:
multiplayer.multiplayer_peer = peer
```
**For Web Builds**: Always use "wss\://" protocol for secure WebSocket connections. For local testing, you can use "ws\://" but production deployments should use TLS.
1. Run your Godot project locally or export a client build
2. Enter the PlayFlow Host and External Port in your connection UI
3. Connect to the server
4. Your game should connect to the PlayFlow server and work correctly!
**Testing Multiple Clients**: Enable **Debug → Customize Run Instances → Enable Multiple Instances** in Godot to test multiple clients connecting to your PlayFlow server.
## Take the Next Steps!
Well done! You've now learned how to setup and deploy your Godot server using PlayFlow.
## Resources
* **PlayFlow Documentation**: [docs.playflowcloud.com](https://docs.playflowcloud.com/)
* **PlayFlow Discord**: [discord.gg/P5w45Vx5Q8](https://discord.gg/P5w45Vx5Q8)
* **Godot Documentation**: [docs.godotengine.org](https://docs.godotengine.org/)
* **Godot Multiplayer**: [docs.godotengine.org/en/stable/tutorials/networking](https://docs.godotengine.org/en/stable/tutorials/networking/)
## Next Steps
Build a complete multiplayer game from scratch
Add lobbies to your Godot game
Implement matchmaking for competitive play
PlayFlow's lobby and matchmaking systems are engine-agnostic REST APIs (`/api/v3/lobbies`), so they work from Godot too. The linked pages use Unity examples, but the same HTTP endpoints apply — call them from GDScript with `HTTPRequest`, sending your key in the `api-key` header.
## Common Issues
Ensure your server detection script uses `OS.has_feature("dedicated_server")` and that the "Export as dedicated server" option is enabled in your export preset.
* Verify TLS is enabled in PlayFlow port configuration
* Ensure you're using "wss\://" protocol for web clients
* Check that the port (8080) matches between your server code and PlayFlow configuration
* Verify firewall rules aren't blocking connections
* Check that MultiplayerSpawner is properly configured
* Verify MultiplayerSynchronizer is set up on player scenes
* Ensure players are being added to the correct groups
* Check that spawn functions are called when peers connect
* Verify the server URL and port are correct
* Check that the PlayFlow server instance is running
* For local testing, use "ws\://" instead of "wss\://"
* Ensure your networking code handles connection failures gracefully