> ## Documentation Index
> Fetch the complete documentation index at: https://docs.playflowcloud.com/llms.txt
> Use this file to discover all available pages before exploring further.
# Quick Start - Fish-Net WebGL
> Simple tutorial showing how easy PlayFlow makes it to host a server for your WebGL game
# Easy WebGL Hosting with PlayFlow
## How PlayFlow Makes WebGL Hosting Easy
For seamless WebGL gaming experiences in web browsers, secure WebSocket connections are crucial, but configuring them can be complex. Often, developers end up managing certificates and networking issues, which can be time-consuming. **With PlayFlow**, however, you only need to enable a simple option to handle these concerns effortlessly.
This guide is based on the [official Fish-Net WebGL tutorial](https://fish-networking.gitbook.io/docs/guides/server-hosting/services/playflow-cloud/easy-webgl-hosting-with-playflow). Visit their guide for additional screenshots and details.
## Before We Begin
This tutorial assumes you've already completed the [standard Fish-Net setup](/quickstart/fishnet). In the following steps, we'll convert your project to support WebGL.
## Setup Steps
For Fish-Net connections on WebGL, we need a web-supported transport. This tutorial uses **Bayou**.
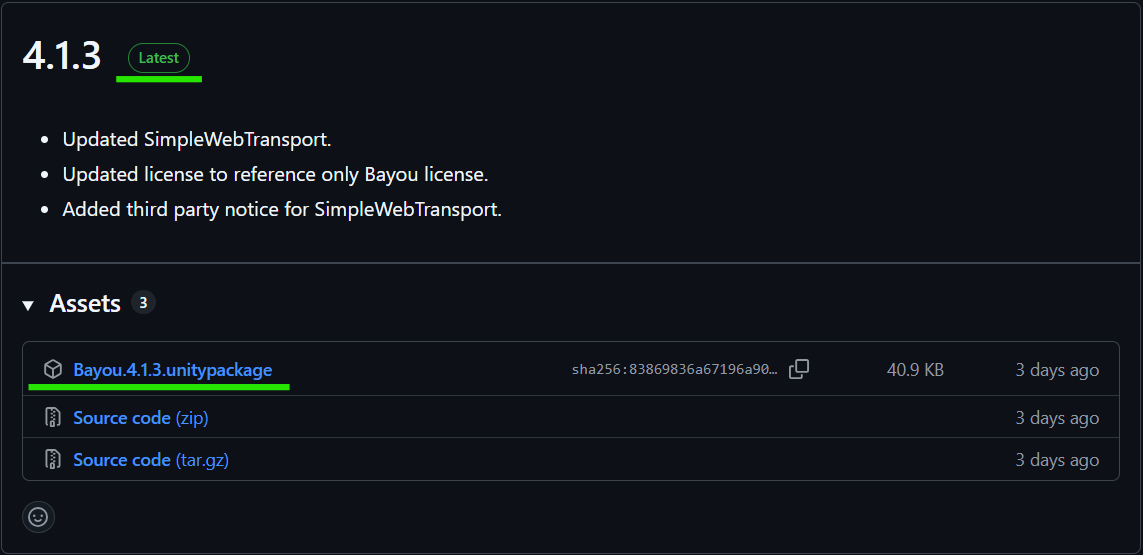
1. Download the latest `unitypackage` from [Bayou GitHub Releases](https://github.com/FirstGearGames/Bayou/releases/latest)
2. Import it into your Unity project
 1. Select your NetworkManager in the scene
2. Add the **Bayou** component to it
1. Select your NetworkManager in the scene
2. Add the **Bayou** component to it
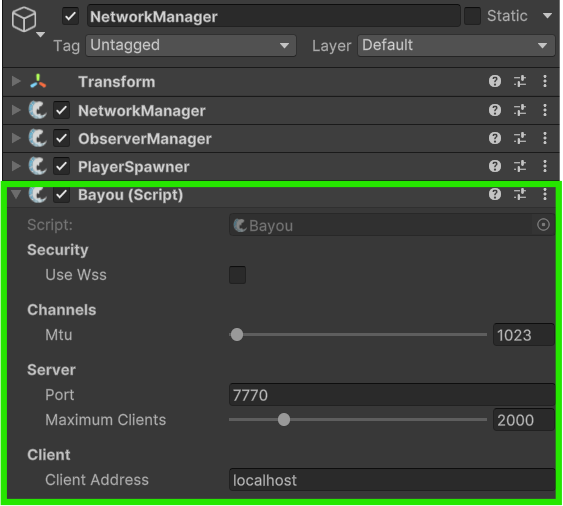 If you have multiple transports (like Tugboat), add the **TransportManager** component and drag Bayou into its **Transport** field to set it as active.
In the Bayou component:
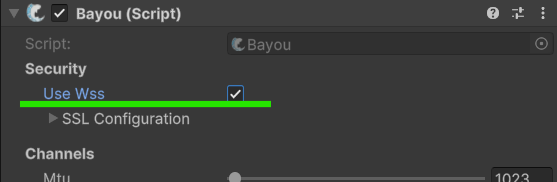
1. Enable the **"Use WSS"** option (Web Socket Secure)
2. SSL Configuration options will appear below - **don't modify these** for PlayFlow
If you have multiple transports (like Tugboat), add the **TransportManager** component and drag Bayou into its **Transport** field to set it as active.
In the Bayou component:
1. Enable the **"Use WSS"** option (Web Socket Secure)
2. SSL Configuration options will appear below - **don't modify these** for PlayFlow
 PlayFlow handles all SSL configuration automatically when you enable TLS.
Open the PlayFlow Cloud window from Unity toolbar (**PlayFlow → PlayFlow Cloud**).
Click **Upload Server** to build and upload your Unity server.
PlayFlow handles all SSL configuration automatically when you enable TLS.
Open the PlayFlow Cloud window from Unity toolbar (**PlayFlow → PlayFlow Cloud**).
Click **Upload Server** to build and upload your Unity server.
 In the [PlayFlow dashboard](https://app.playflowcloud.com/):
1. Navigate to **Configuration** tab
2. Add or edit your port
3. Choose **TCP** protocol
4. **Enable TLS** ✓ (Critical for WebGL)
5. Save configuration
In the [PlayFlow dashboard](https://app.playflowcloud.com/):
1. Navigate to **Configuration** tab
2. Add or edit your port
3. Choose **TCP** protocol
4. **Enable TLS** ✓ (Critical for WebGL)
5. Save configuration
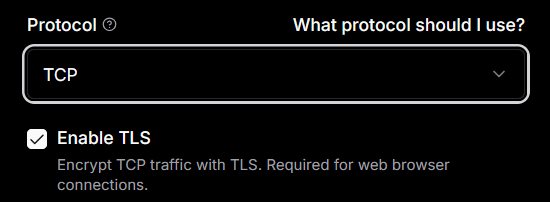 **Why TCP with TLS?** WebGL requires secure WebSocket connections. PlayFlow handles the SSL certificates automatically when you enable TLS. TLS is a separate checkbox that can only be enabled on **TCP** ports, so choose TCP first, then tick TLS.
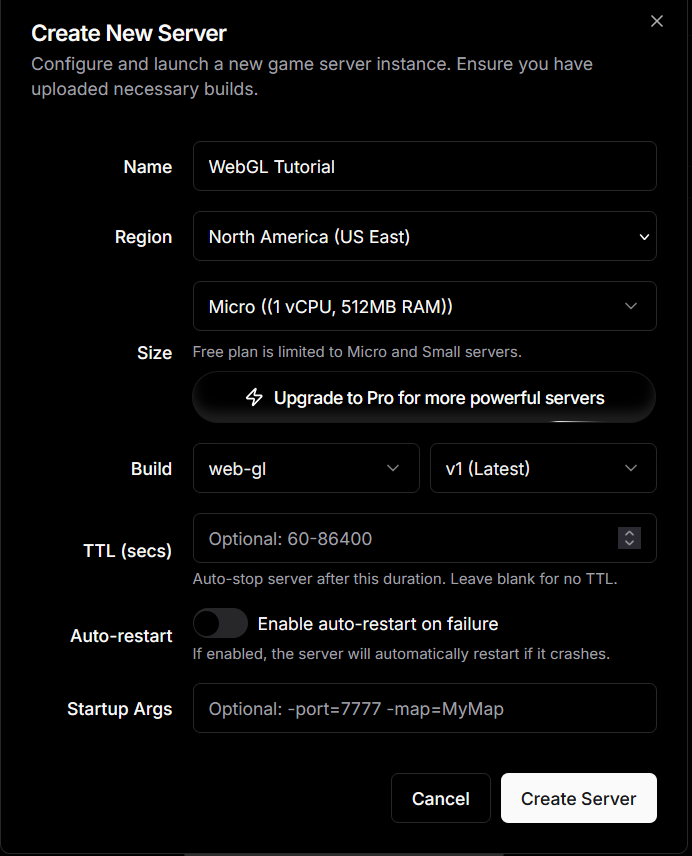
1. Go to the **Servers** tab in PlayFlow
2. Create your server instance
3. Select your uploaded build
4. Launch the server
**Why TCP with TLS?** WebGL requires secure WebSocket connections. PlayFlow handles the SSL certificates automatically when you enable TLS. TLS is a separate checkbox that can only be enabled on **TCP** ports, so choose TCP first, then tick TLS.
1. Go to the **Servers** tab in PlayFlow
2. Create your server instance
3. Select your uploaded build
4. Launch the server
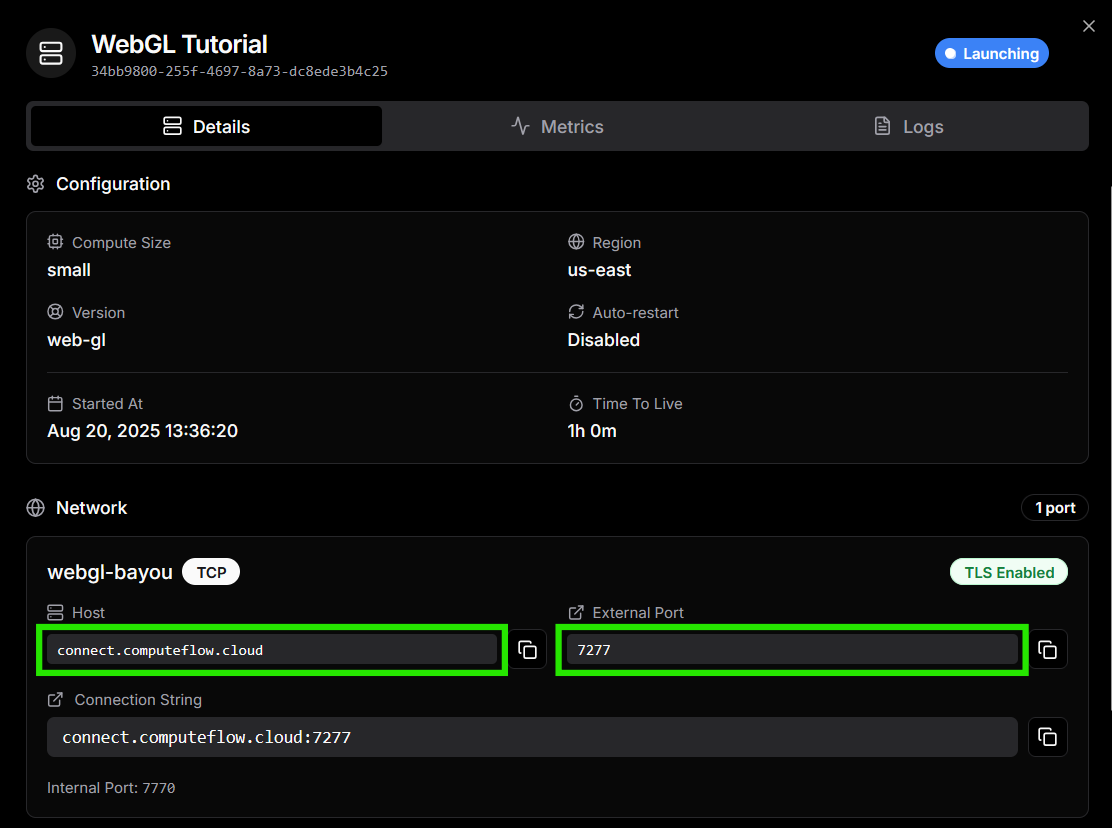
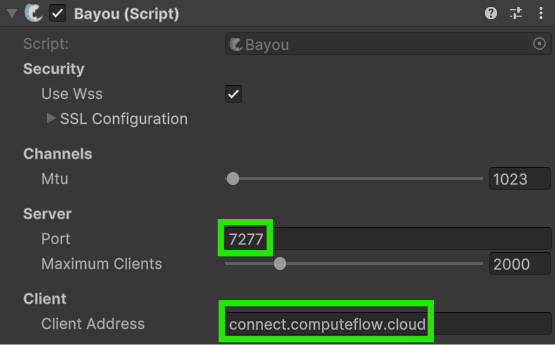
 1. Click on your server instance's **Details**
2. Look for the **TLS Connection** information (this maps to the `host` and `external_port` of the TCP entry in the server's `network_ports` array from the API)
3. In Unity, select the Bayou component
4. Enter the TLS **host** into the **Client Address** field
5. Enter the **external port** into the **Port** field
**Read the host and port from your server, never hardcode them.** The TLS host and the external port are shown in the server's TLS Connection details (and returned in the `network_ports[]` array from the API). The external port is allocated per server and differs from your internal port, so copy the exact values PlayFlow gives you rather than assuming a fixed hostname or port.
1. Click on your server instance's **Details**
2. Look for the **TLS Connection** information (this maps to the `host` and `external_port` of the TCP entry in the server's `network_ports` array from the API)
3. In Unity, select the Bayou component
4. Enter the TLS **host** into the **Client Address** field
5. Enter the **external port** into the **Port** field
**Read the host and port from your server, never hardcode them.** The TLS host and the external port are shown in the server's TLS Connection details (and returned in the `network_ports[]` array from the API). The external port is allocated per server and differs from your internal port, so copy the exact values PlayFlow gives you rather than assuming a fixed hostname or port.
 1. In Unity, switch to **WebGL** platform in Build Settings
2. Build your game
3. Zip the built files
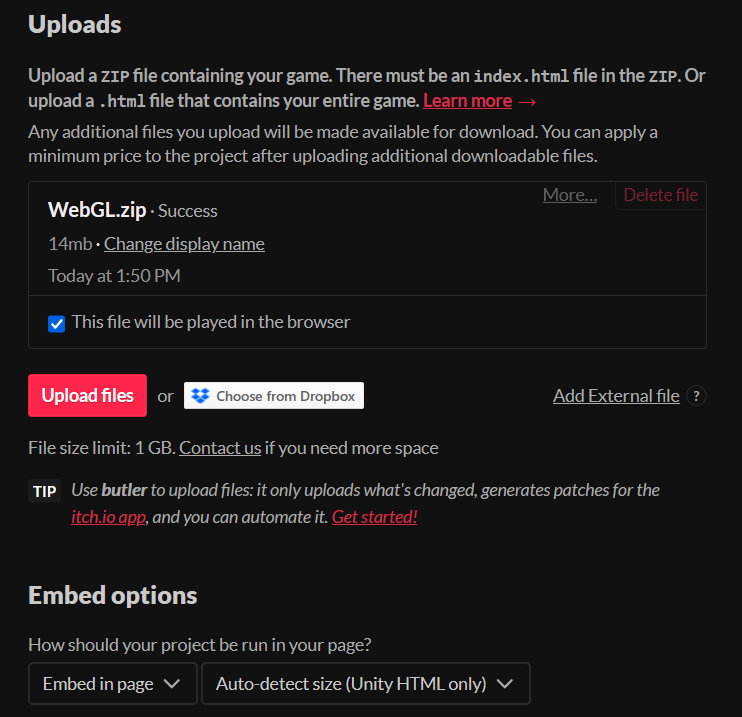
4. Upload to your chosen hosting platform (e.g., itch.io, GitHub Pages)
1. In Unity, switch to **WebGL** platform in Build Settings
2. Build your game
3. Zip the built files
4. Upload to your chosen hosting platform (e.g., itch.io, GitHub Pages)
 The example below shows hosting on itch.io:
 ## Success!
Just like that, you've created a server and have your clients in the web browser securely connecting to it!
## Troubleshooting
* Verify TLS is enabled in PlayFlow port settings
* Check that the client is using the TLS host copied from the server details (not an IP address)
* Ensure "Use WSS" is enabled in Bayou
* Confirm the external port matches the value from your server's `network_ports` (it is allocated per server and differs from the internal port)
If you have both Tugboat and Bayou on your NetworkManager, make sure to add TransportManager component and set Bayou as the active transport.
Don't modify the SSL Configuration settings in Bayou - PlayFlow handles all certificates automatically when TLS is enabled.
## Resources
* **PlayFlow Documentation**: [docs.playflowcloud.com](https://docs.playflowcloud.com/)
* **PlayFlow Discord**: [discord.gg/P5w45Vx5Q8](https://discord.gg/P5w45Vx5Q8)
* **Fish-Net Documentation**: [fish-networking.gitbook.io](https://fish-networking.gitbook.io/docs/)
## Related Guides
Advanced WebGL deployment strategies
Standard Fish-Net setup for desktop/mobile
Add lobbies to your WebGL game
## Success!
Just like that, you've created a server and have your clients in the web browser securely connecting to it!
## Troubleshooting
* Verify TLS is enabled in PlayFlow port settings
* Check that the client is using the TLS host copied from the server details (not an IP address)
* Ensure "Use WSS" is enabled in Bayou
* Confirm the external port matches the value from your server's `network_ports` (it is allocated per server and differs from the internal port)
If you have both Tugboat and Bayou on your NetworkManager, make sure to add TransportManager component and set Bayou as the active transport.
Don't modify the SSL Configuration settings in Bayou - PlayFlow handles all certificates automatically when TLS is enabled.
## Resources
* **PlayFlow Documentation**: [docs.playflowcloud.com](https://docs.playflowcloud.com/)
* **PlayFlow Discord**: [discord.gg/P5w45Vx5Q8](https://discord.gg/P5w45Vx5Q8)
* **Fish-Net Documentation**: [fish-networking.gitbook.io](https://fish-networking.gitbook.io/docs/)
## Related Guides
Advanced WebGL deployment strategies
Standard Fish-Net setup for desktop/mobile
Add lobbies to your WebGL game